Friday, July 26, 2019

Floodwater doors, ‘60s wallpaper and changes in priorities

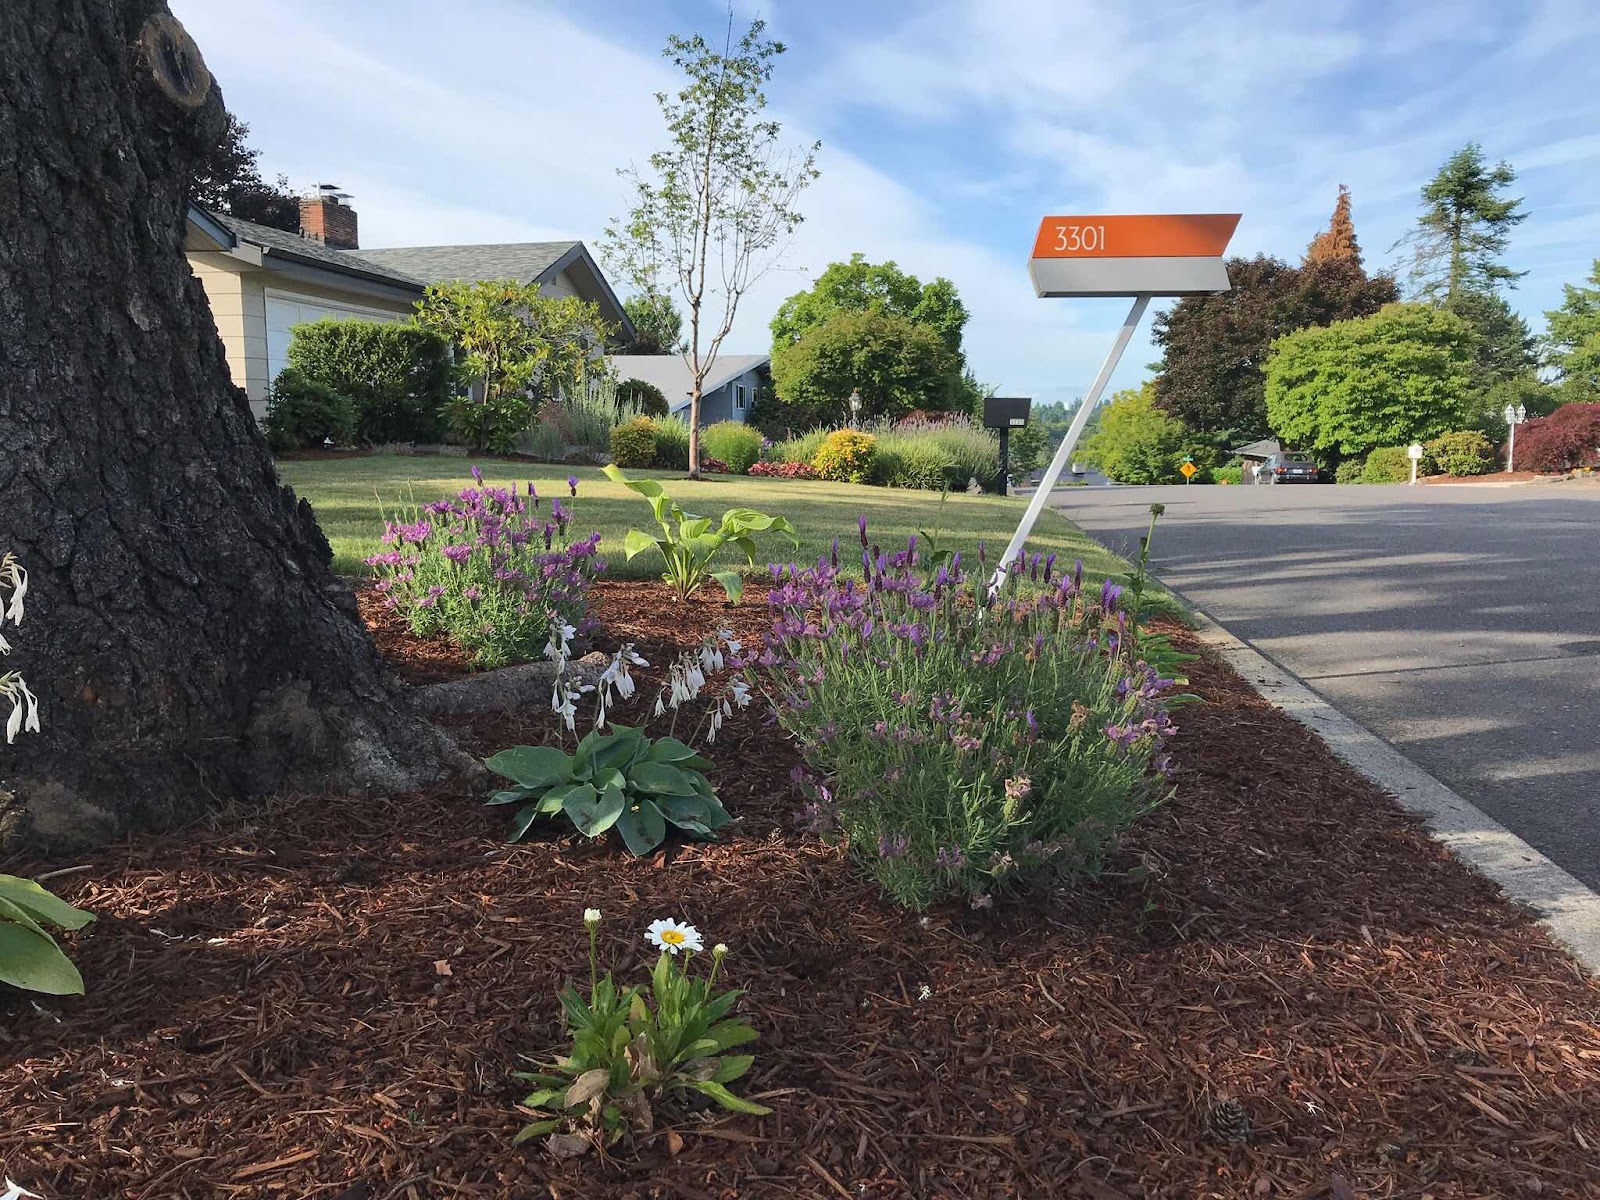
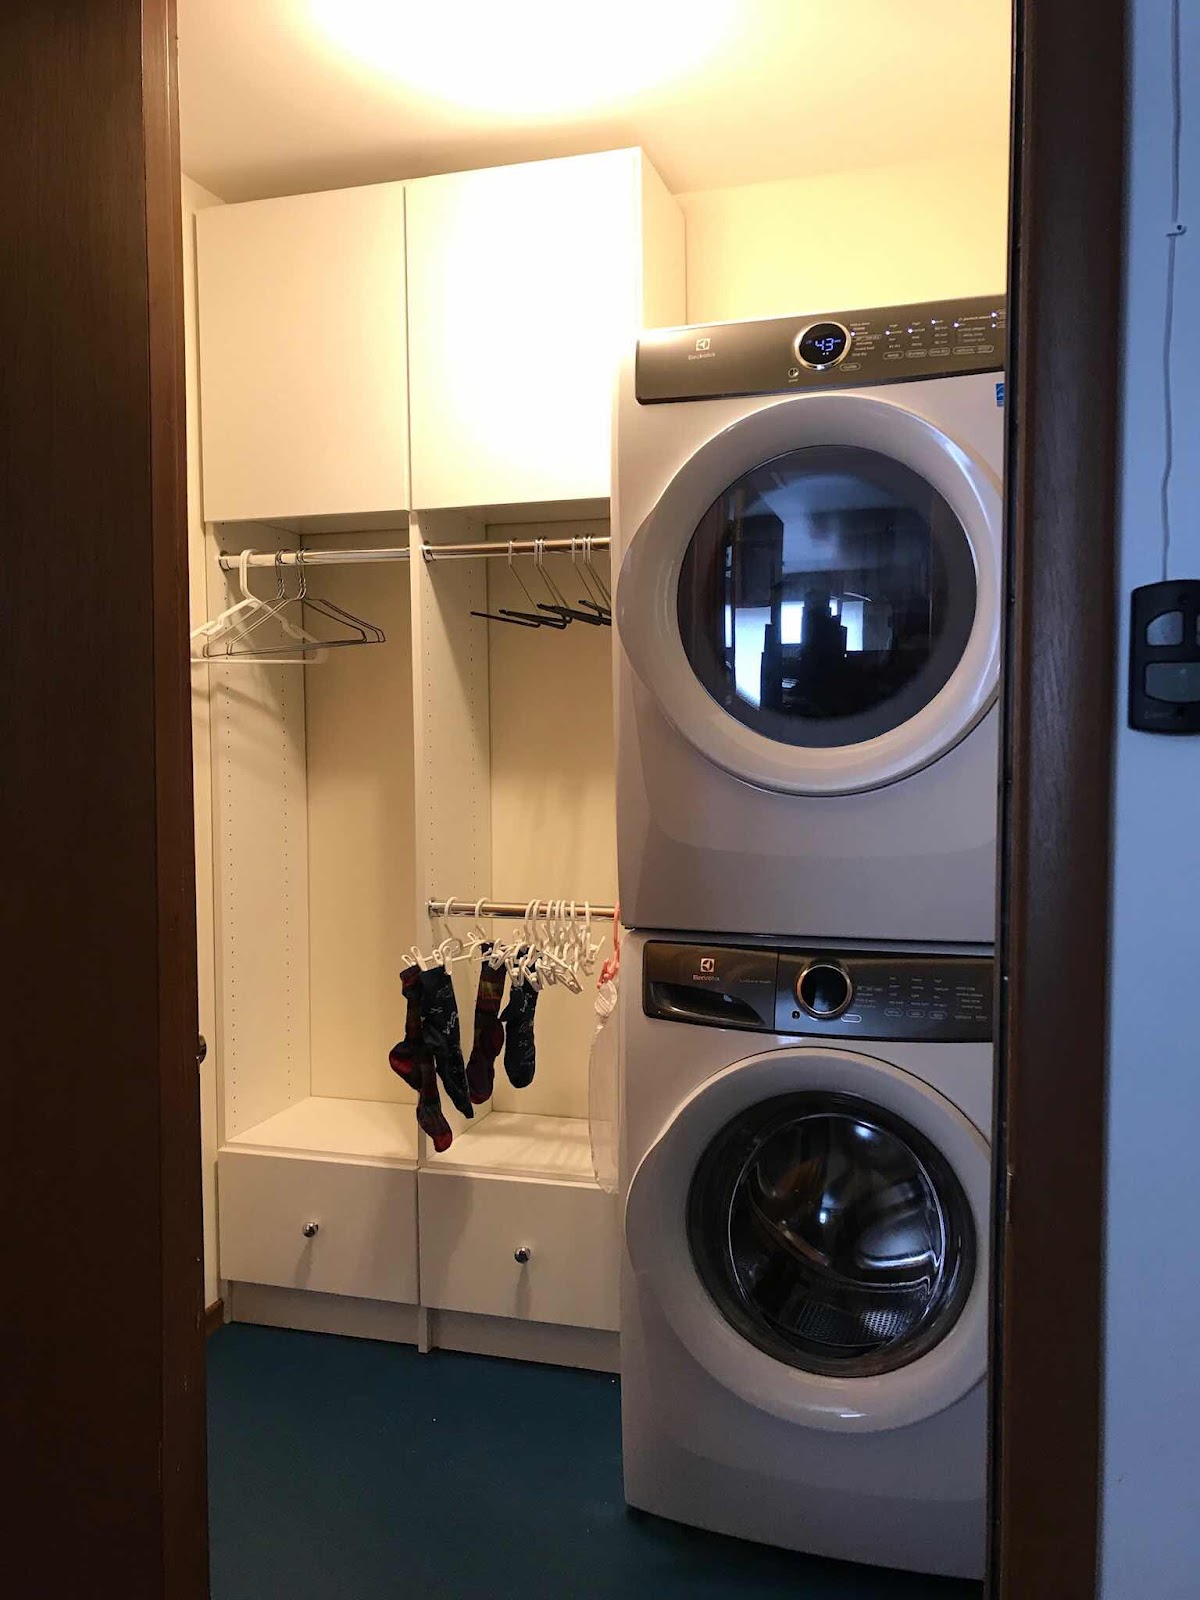
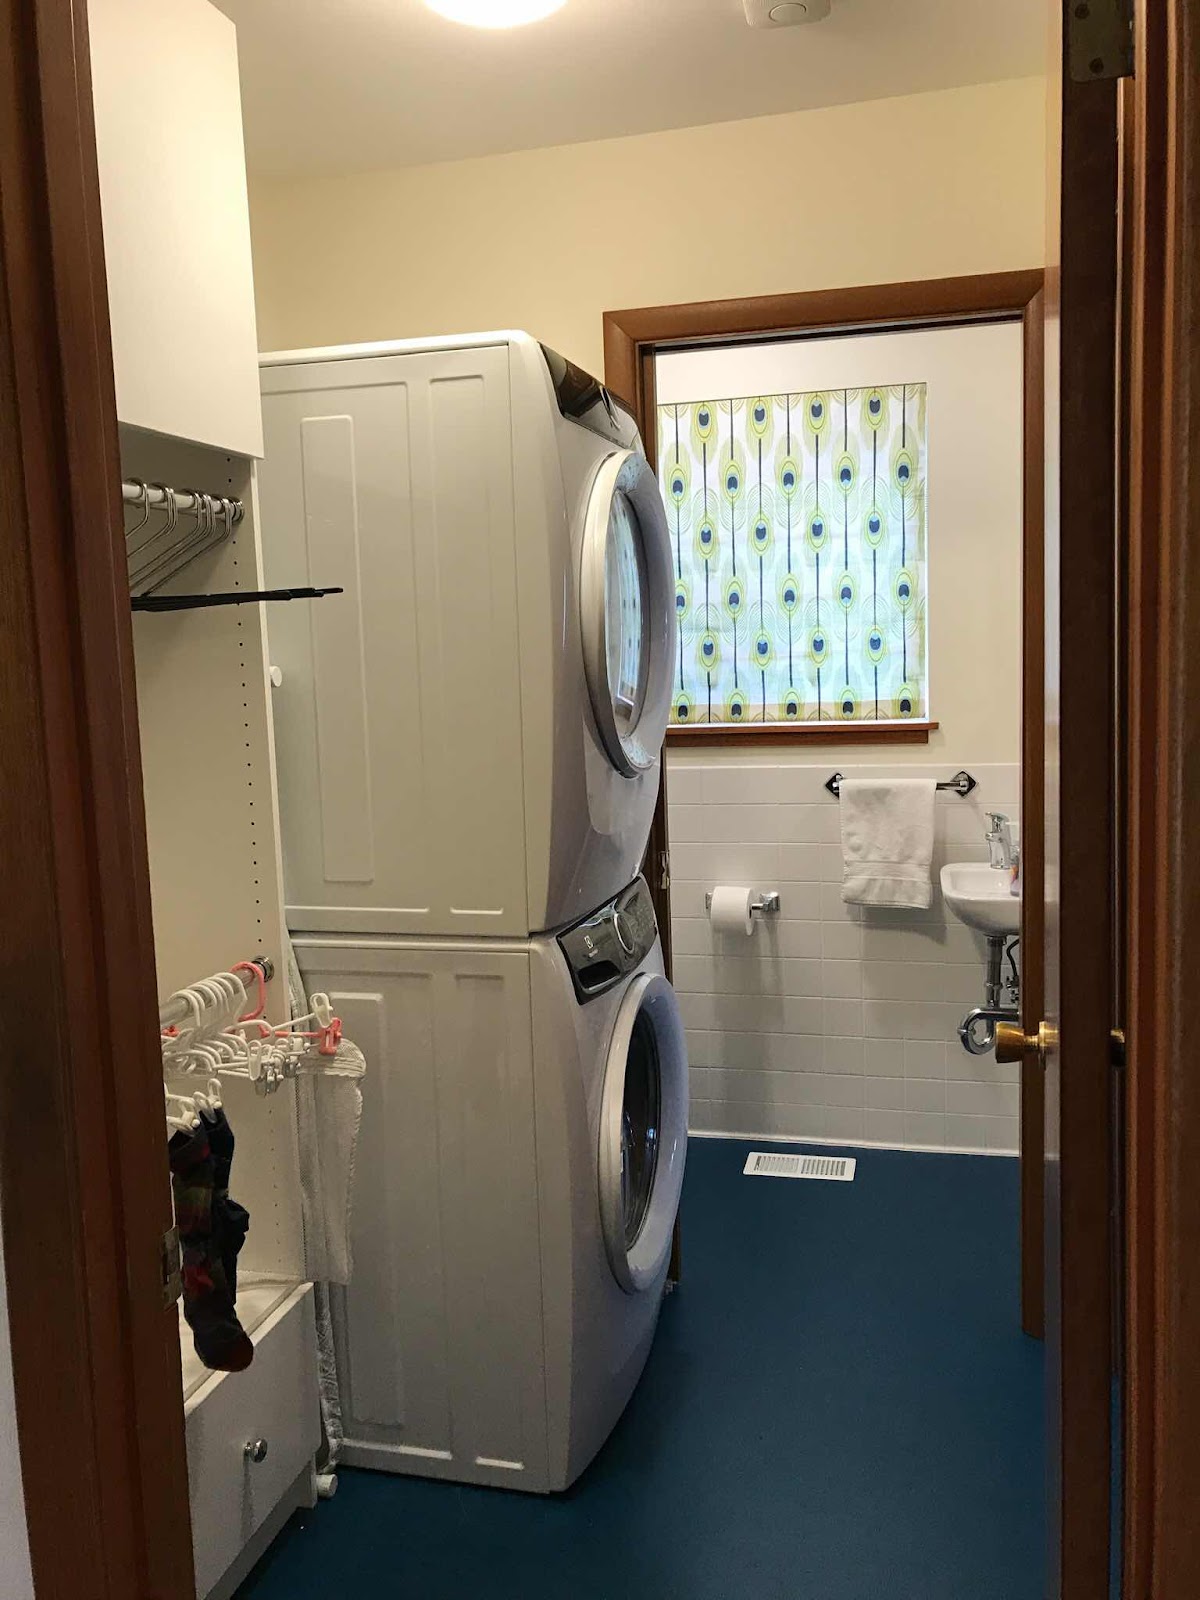
When Beth and I moved into the Retro Ranch in December 2016, there was so much to do to restore this lovely home that we had to set priorities on what needed to be addressed and when, not to mention, what we could afford. There were infrastructure projects such as the furnace, electrical systemschimney workand plumbing.  The exterior projects of tree careremoval of shrubs, bushes and trees long past their prime and, of course, painting. (Did we forget to mention rocks?) We enhanced the living spaces by paintingnew door handles and locks, closet systemsand other countless touch points. Some projects overlapped both cosmetic and infrastructure: the bathroom renovation, the laundry/half bath project, the new garage door and on and on. The point of rehashing the various projects is to note that some things we wanted to do were so far down on the priority list they didn’t even make the radar two years ago.


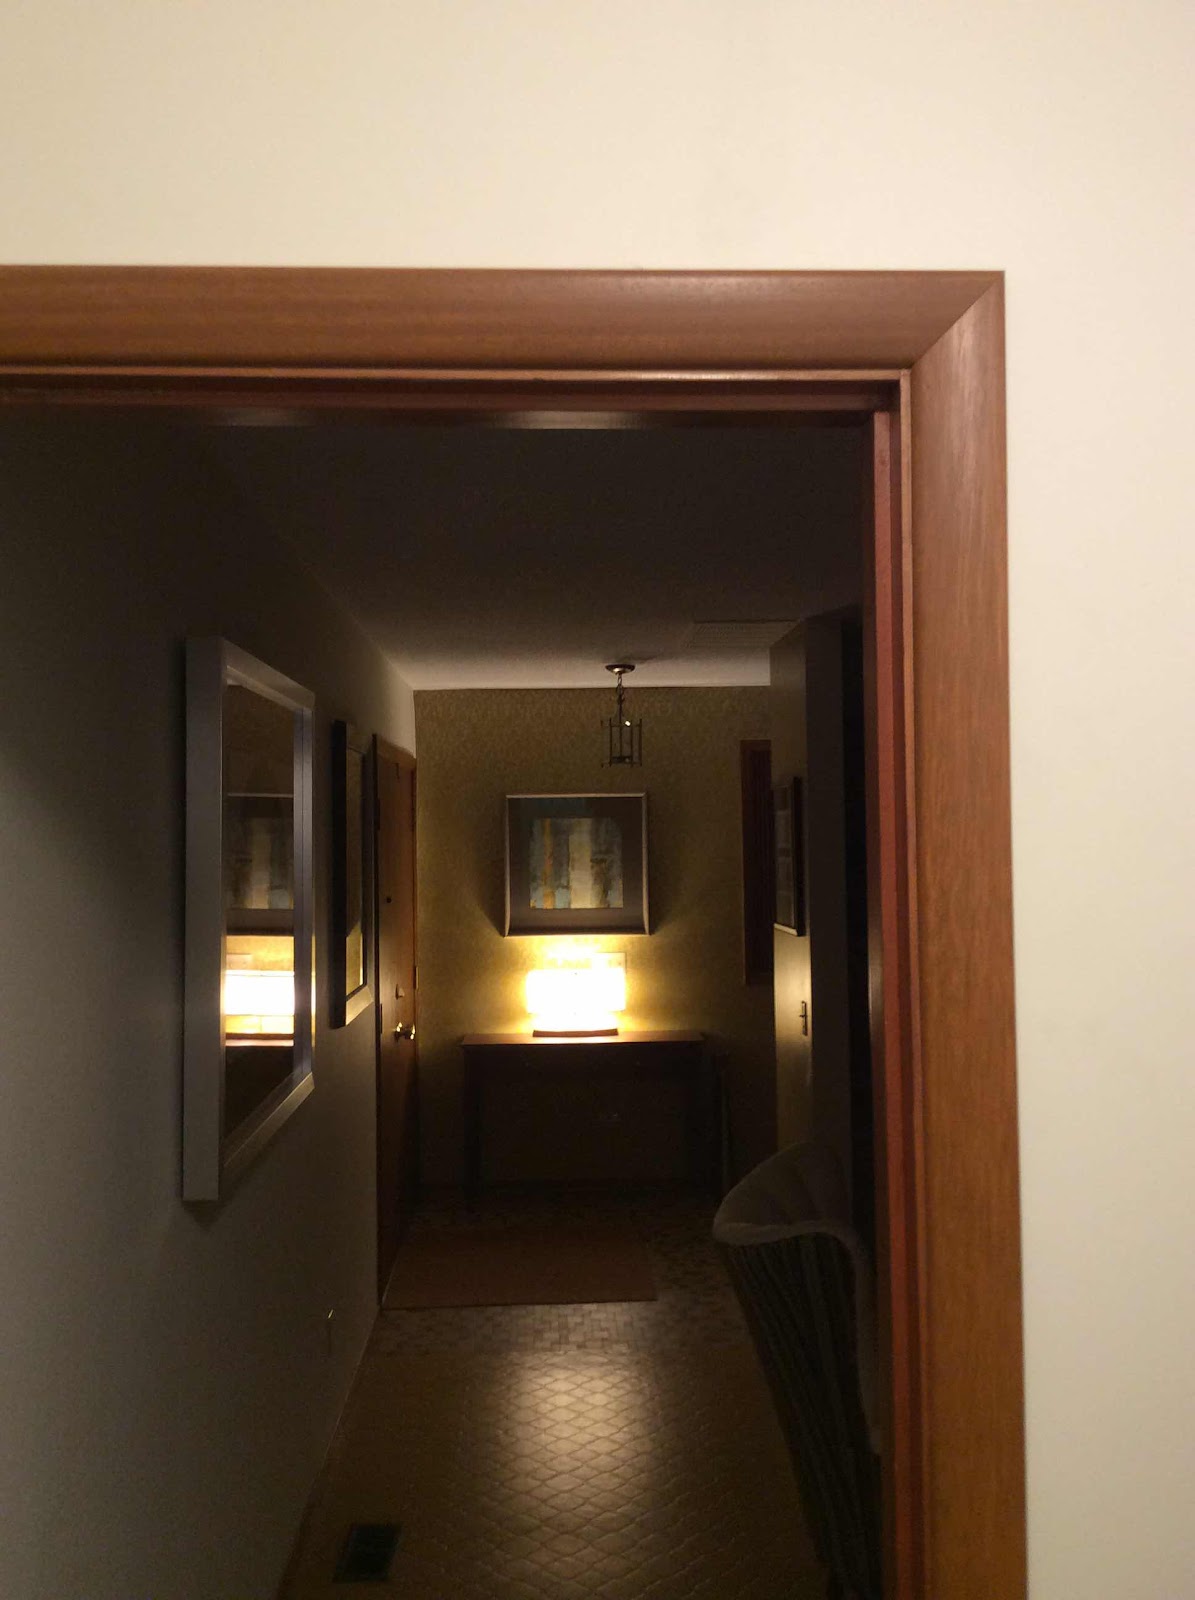
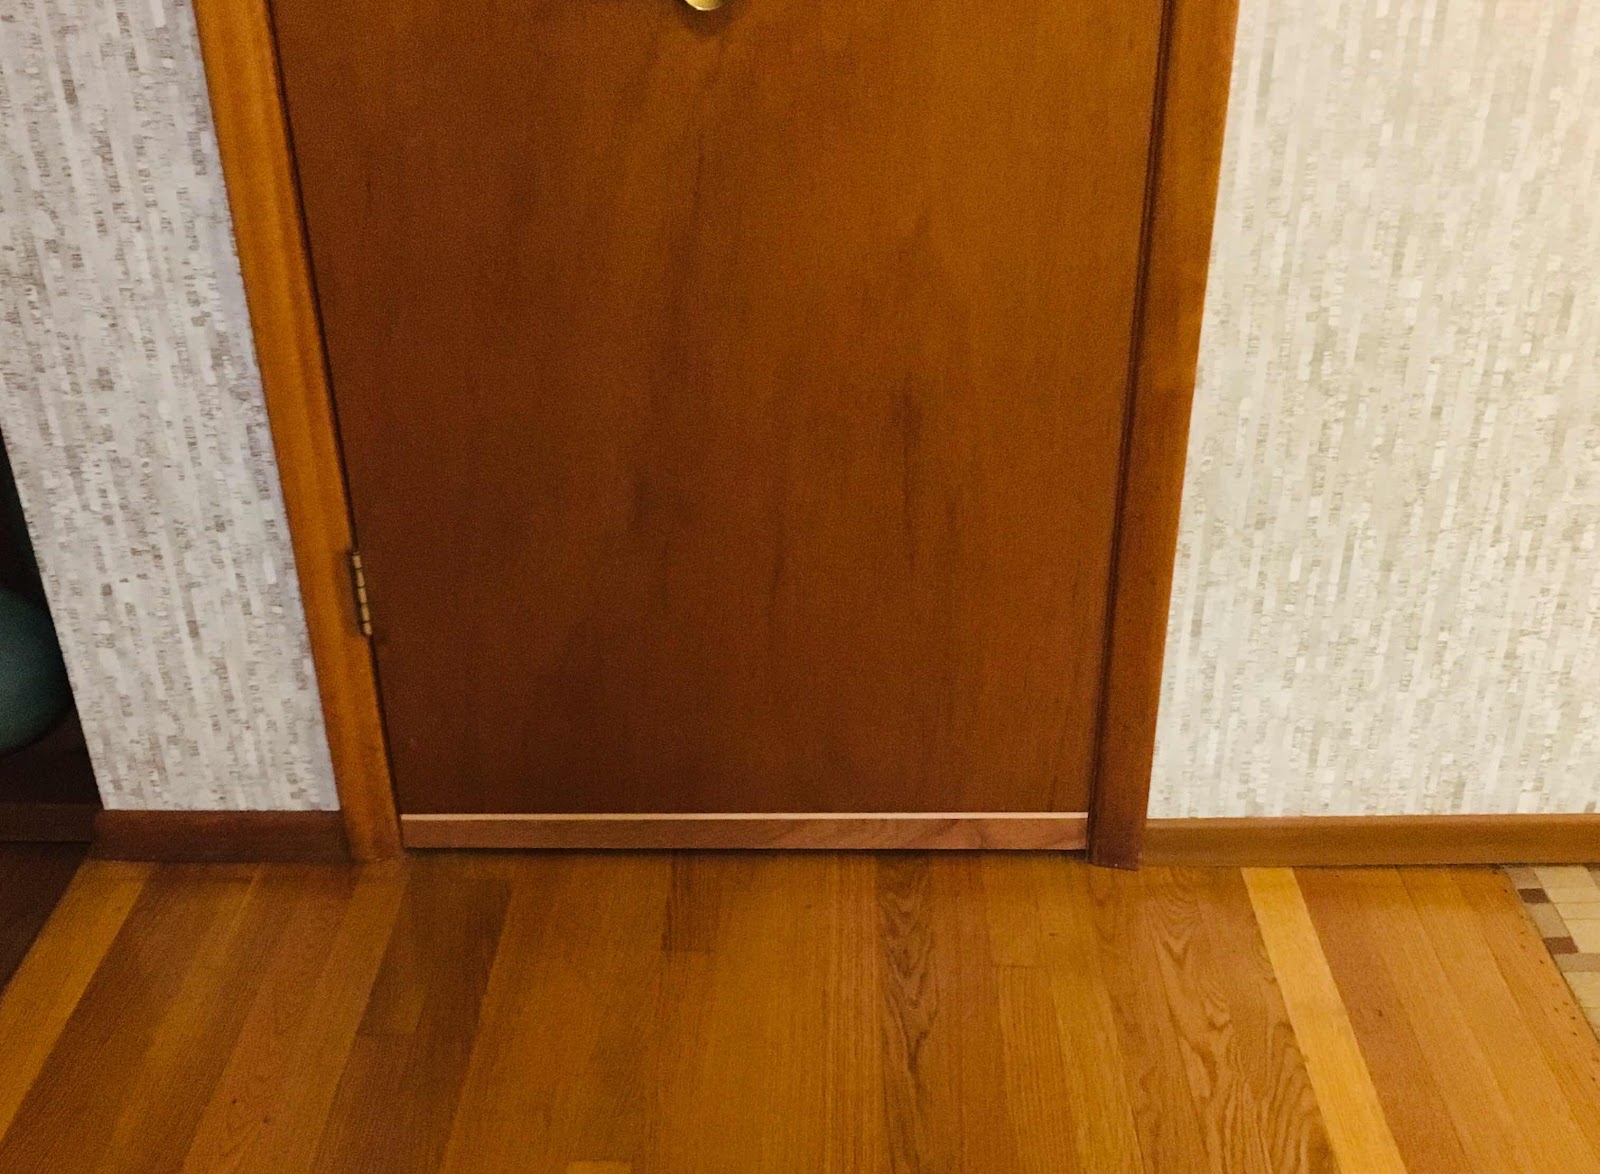
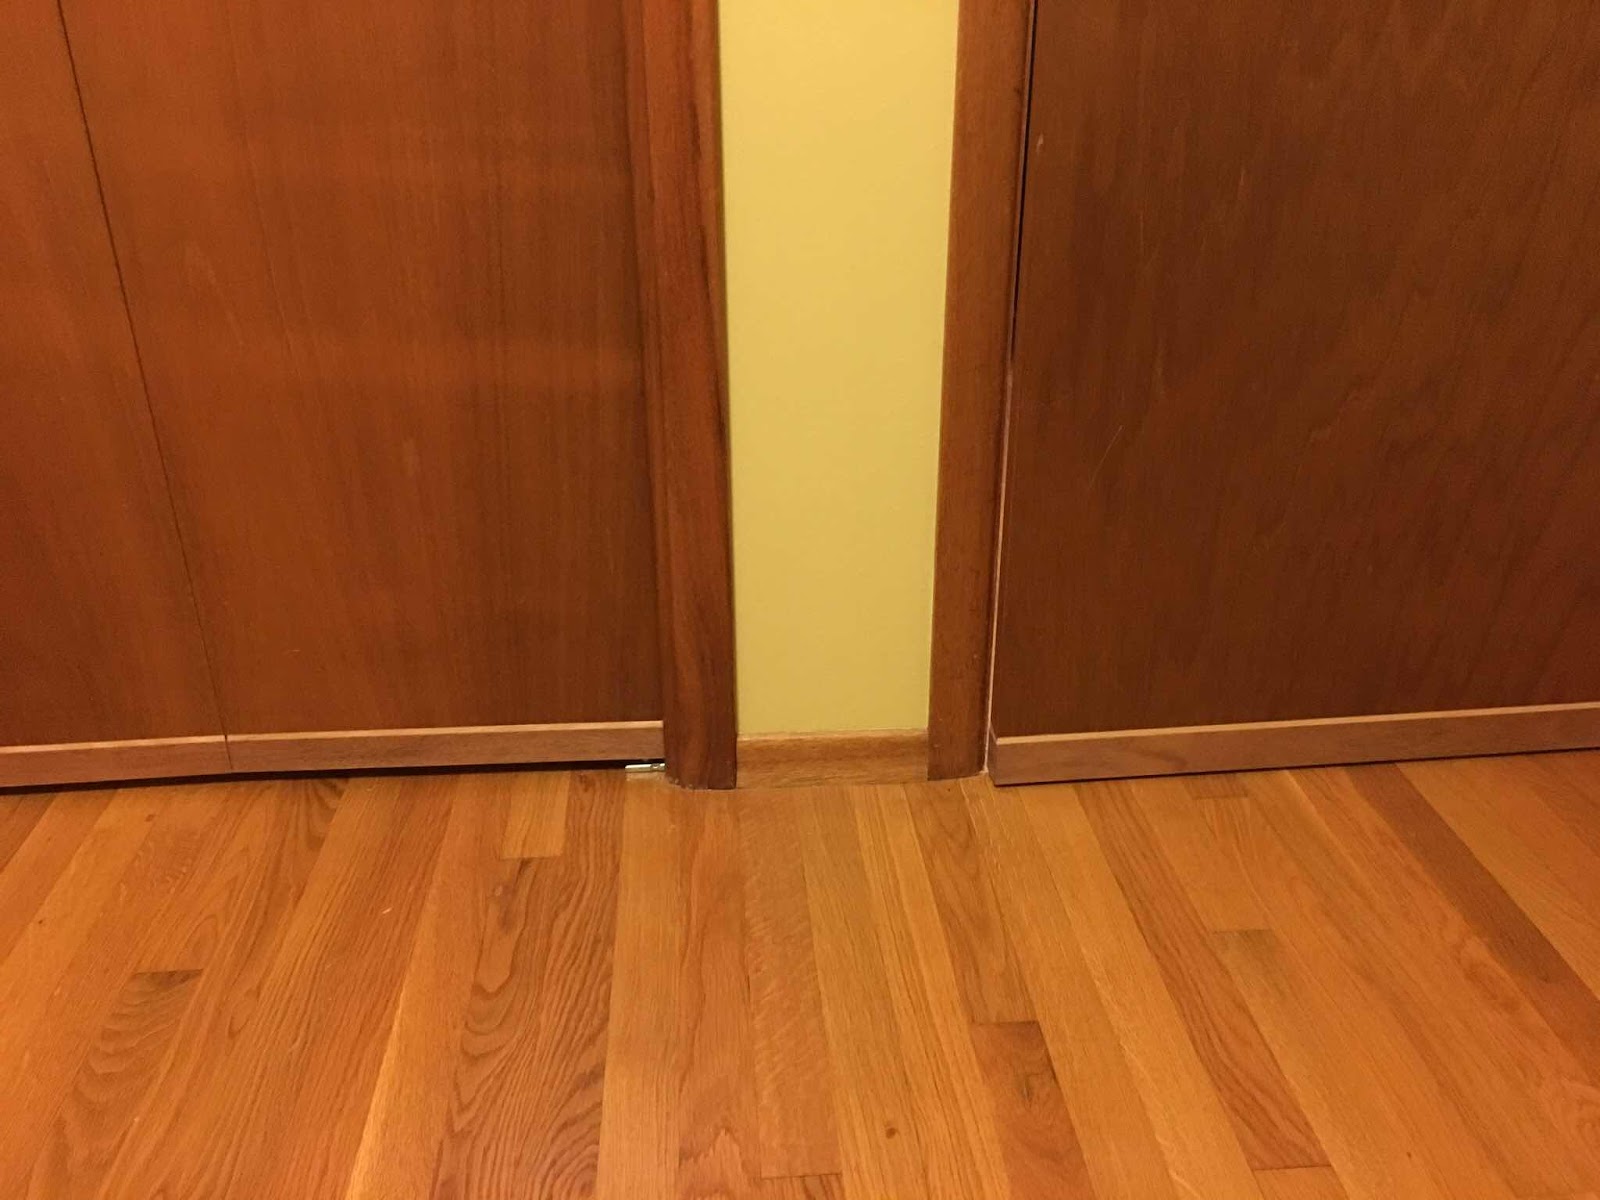
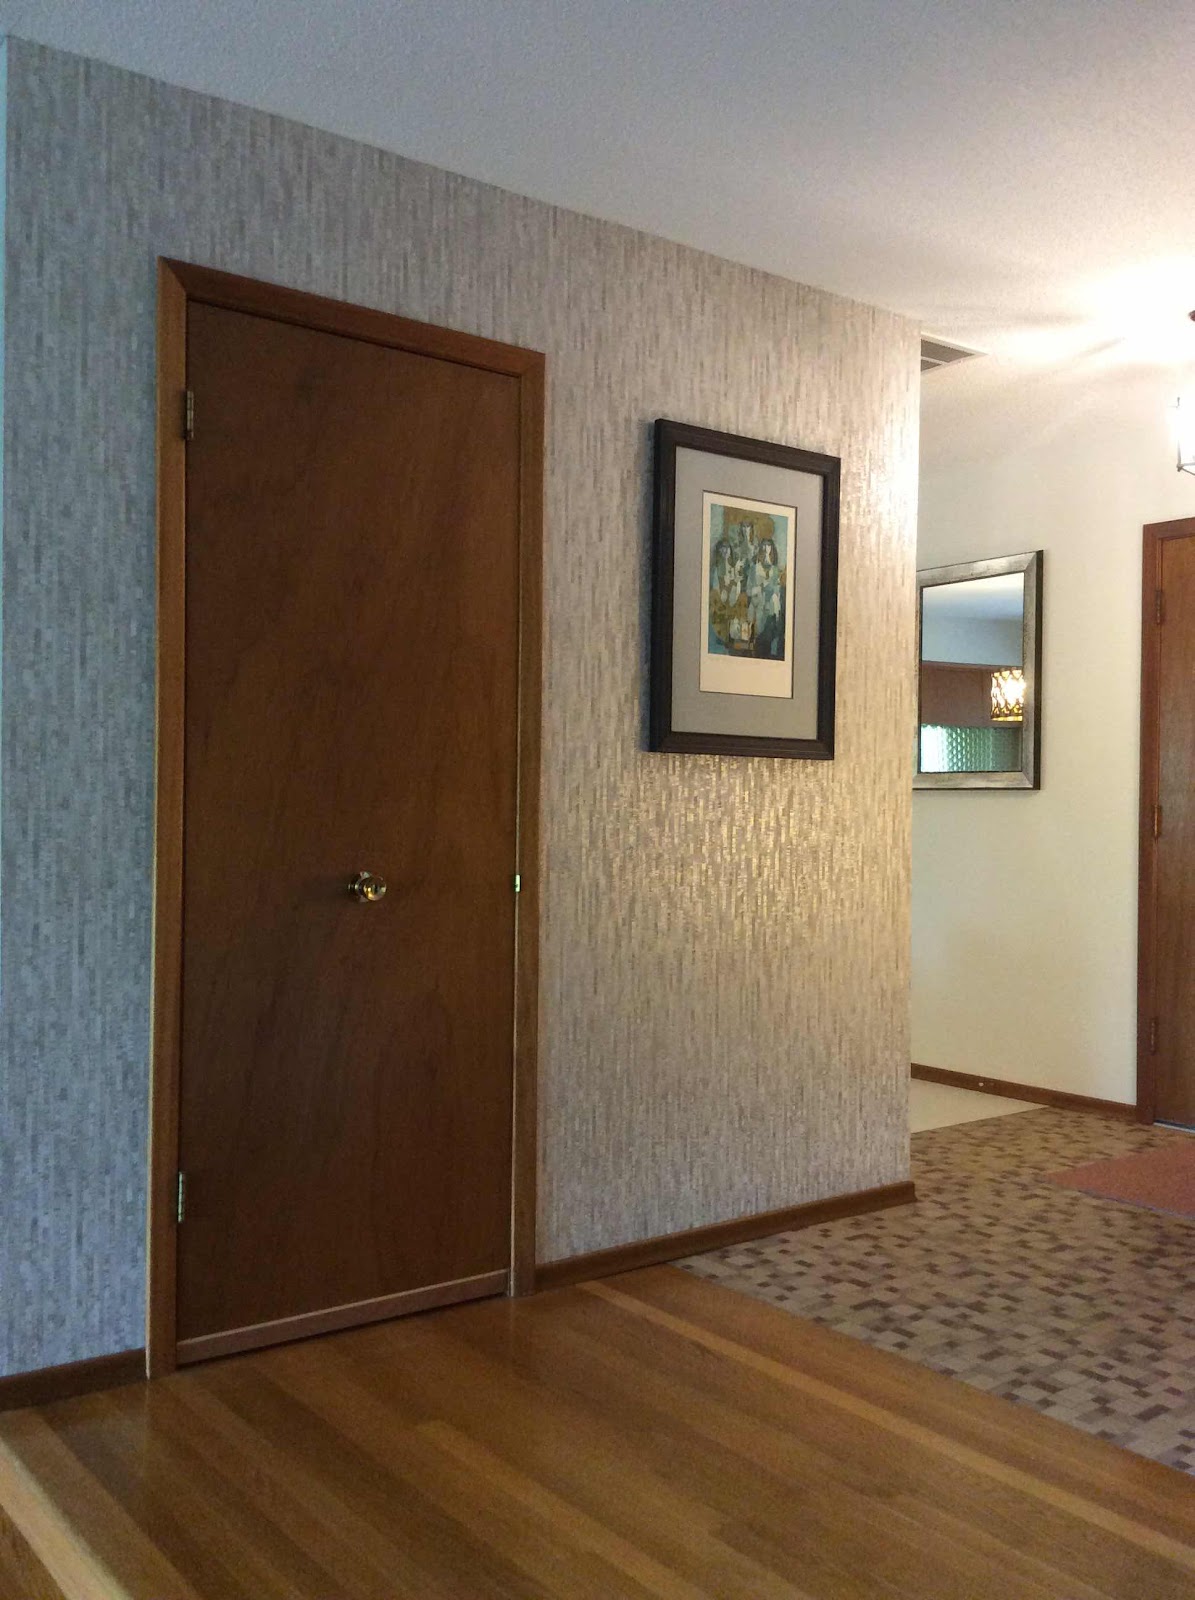
For our long time reader (you know who you are) or for those interested enough to read the early blogs, the very first “project” we did in the Retro Ranch was to pull up the wall to wall carpeting that was both long worn out and was covering beautiful red oak floors. Hardwood floors fell out of style in the late 60s and early 70s so many beautiful floors were covered in carpet. To install the wall to wall carpet in houses with hardwood floors, unfortunately, meant that for doors to swing freely over the carpet, shortening the doors was required. So like a teenage boy’s pants during his growth spurt, we now had beautiful mahogany doors (bedrooms, closets, etc.) that were obviously too short. 

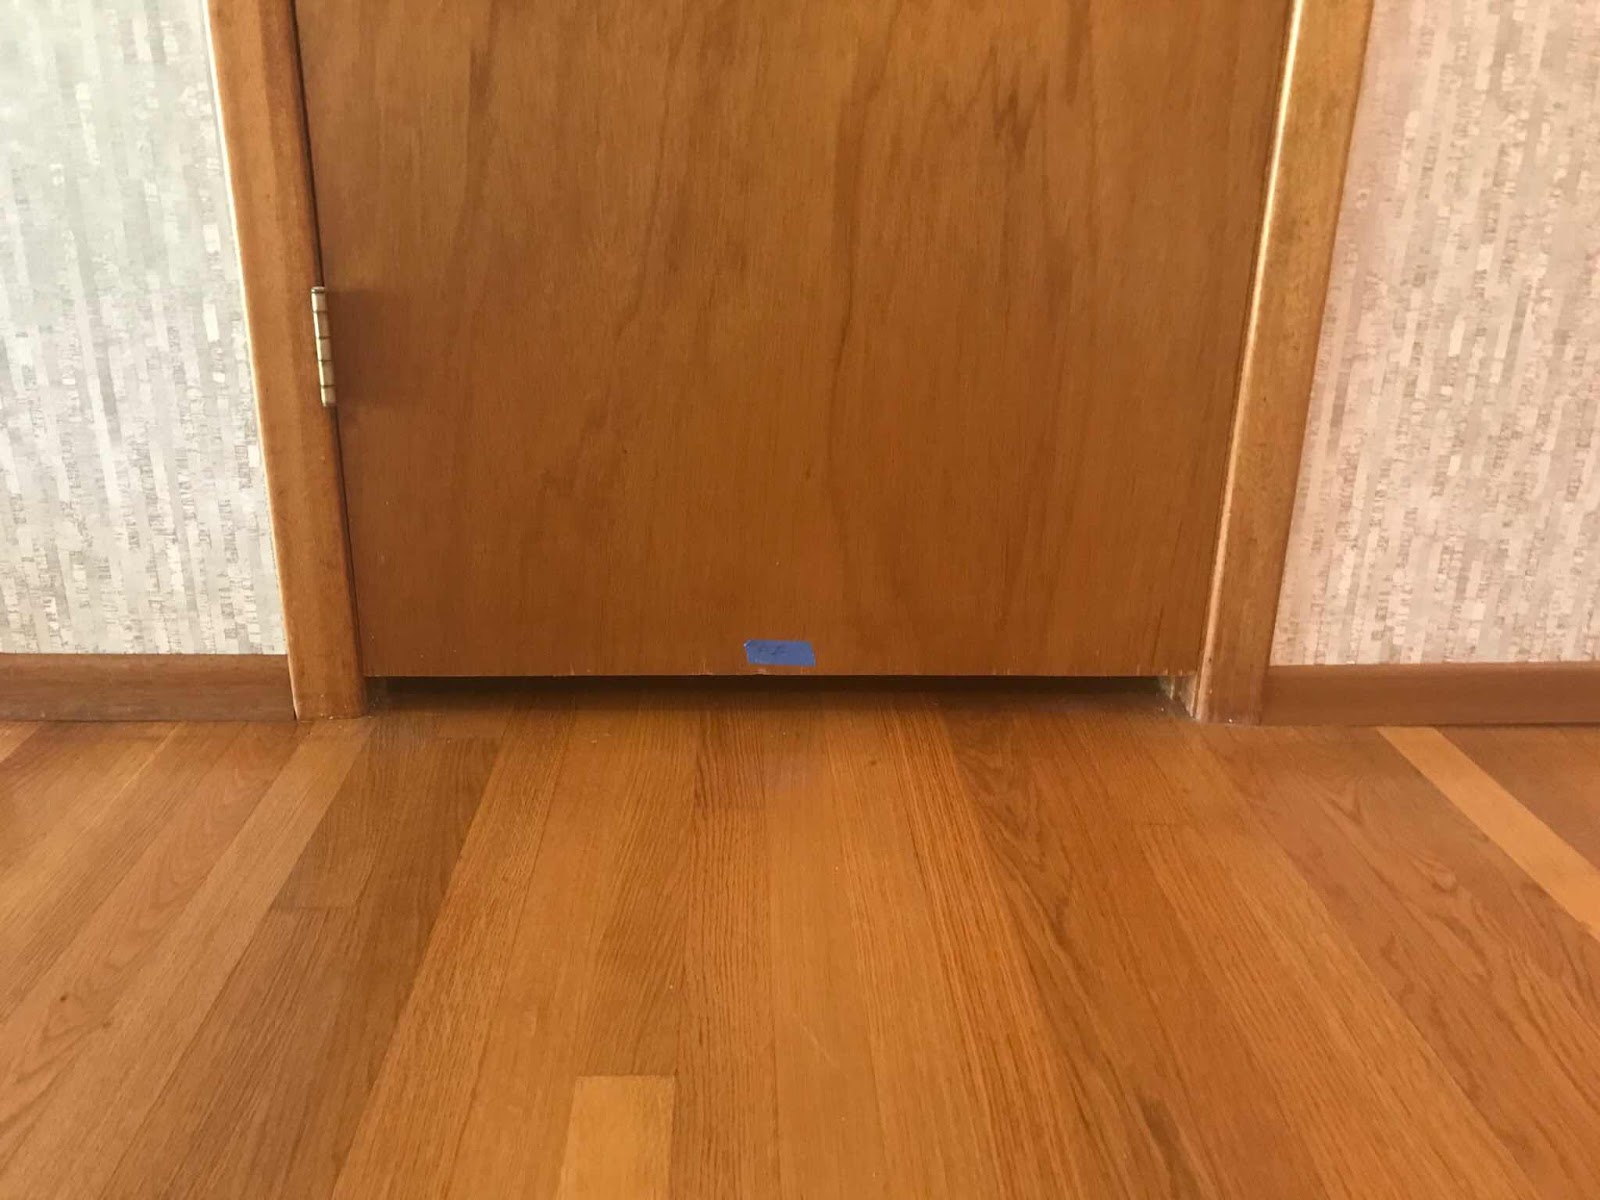
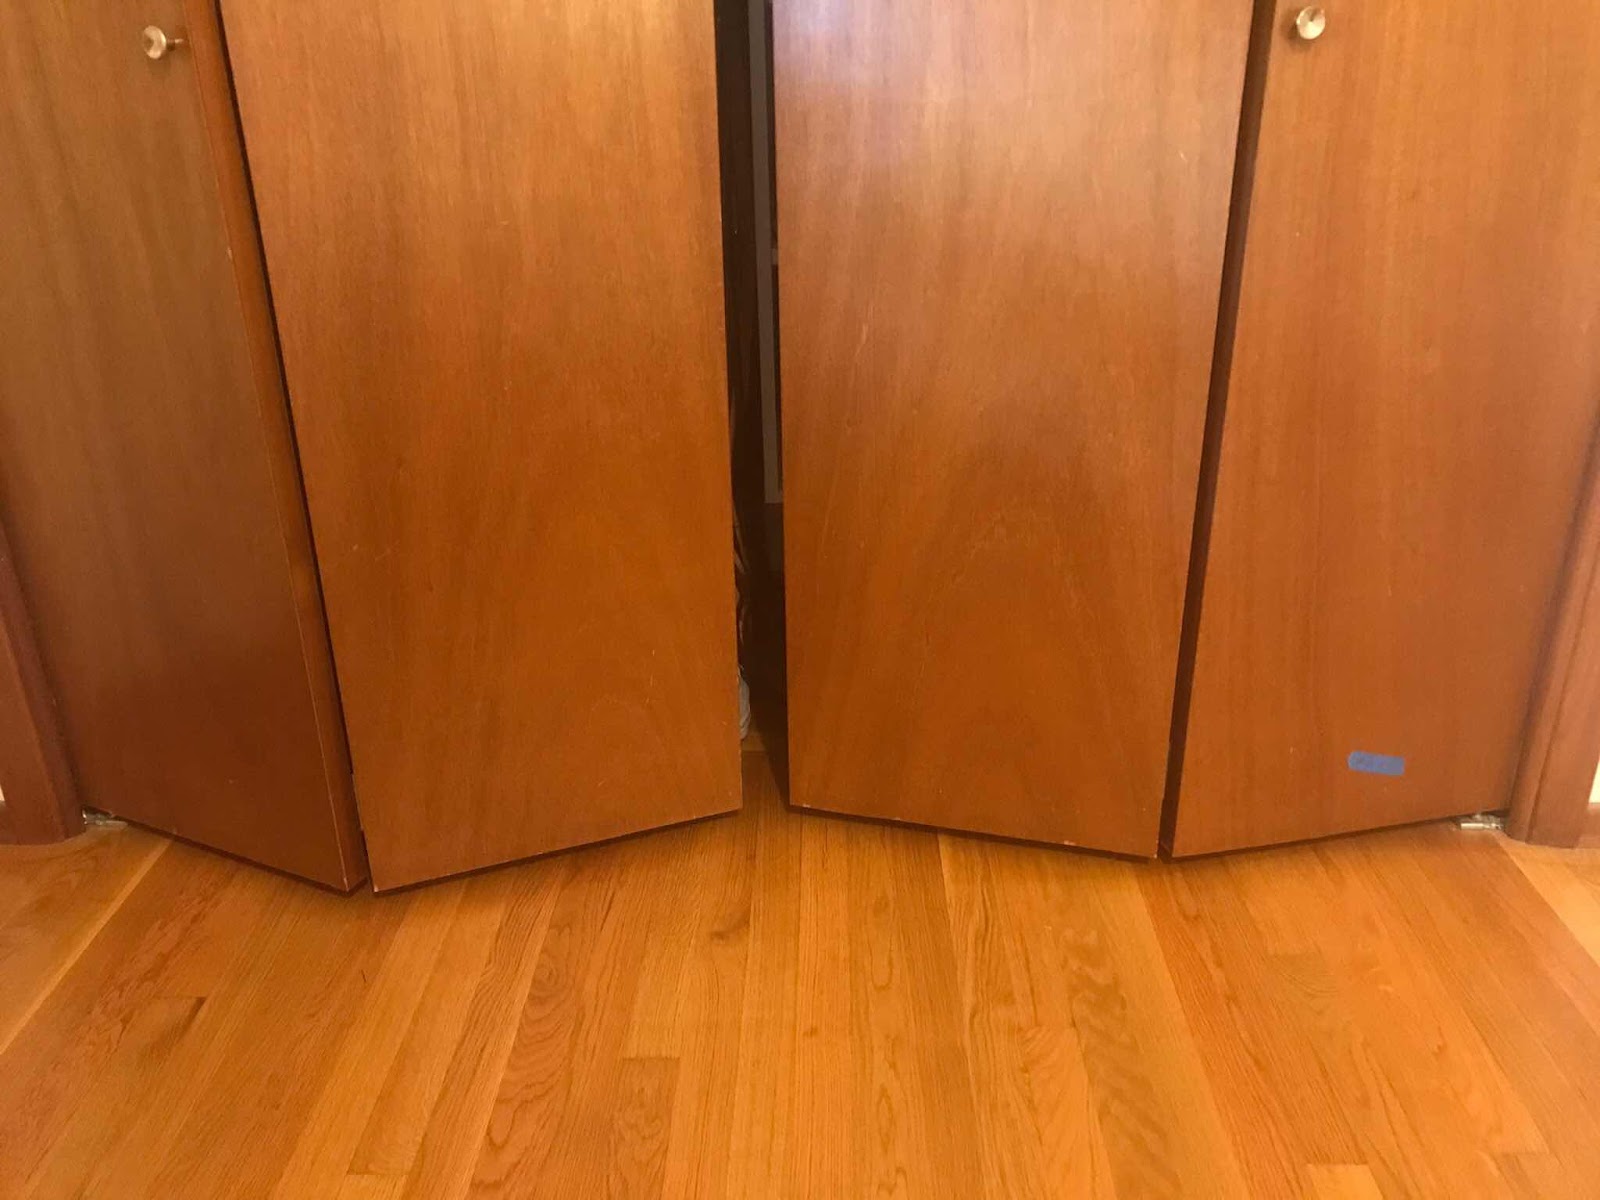
While this was something that bothered us it was low on the priority list. To replace all of the doors would be expensive but finding the “right” doors (ones that fit the house) would be even more challenging. Enter our friend and wood artisan extraordinaire – Daniel Moulder of Moulder and Craft. Daniel looked at the solution as a way to make the Ranch even more appealing; why not add decorative extensions to the bottom of the doors? So with a maple trim strip and mahogany extensions, Daniel was able to make “floodwater doors” into a unique, decorative accent throughout the house. They match the baseboard trim height and look like they have always (should have always) been part of the house. What an amazing idea and craftsman!

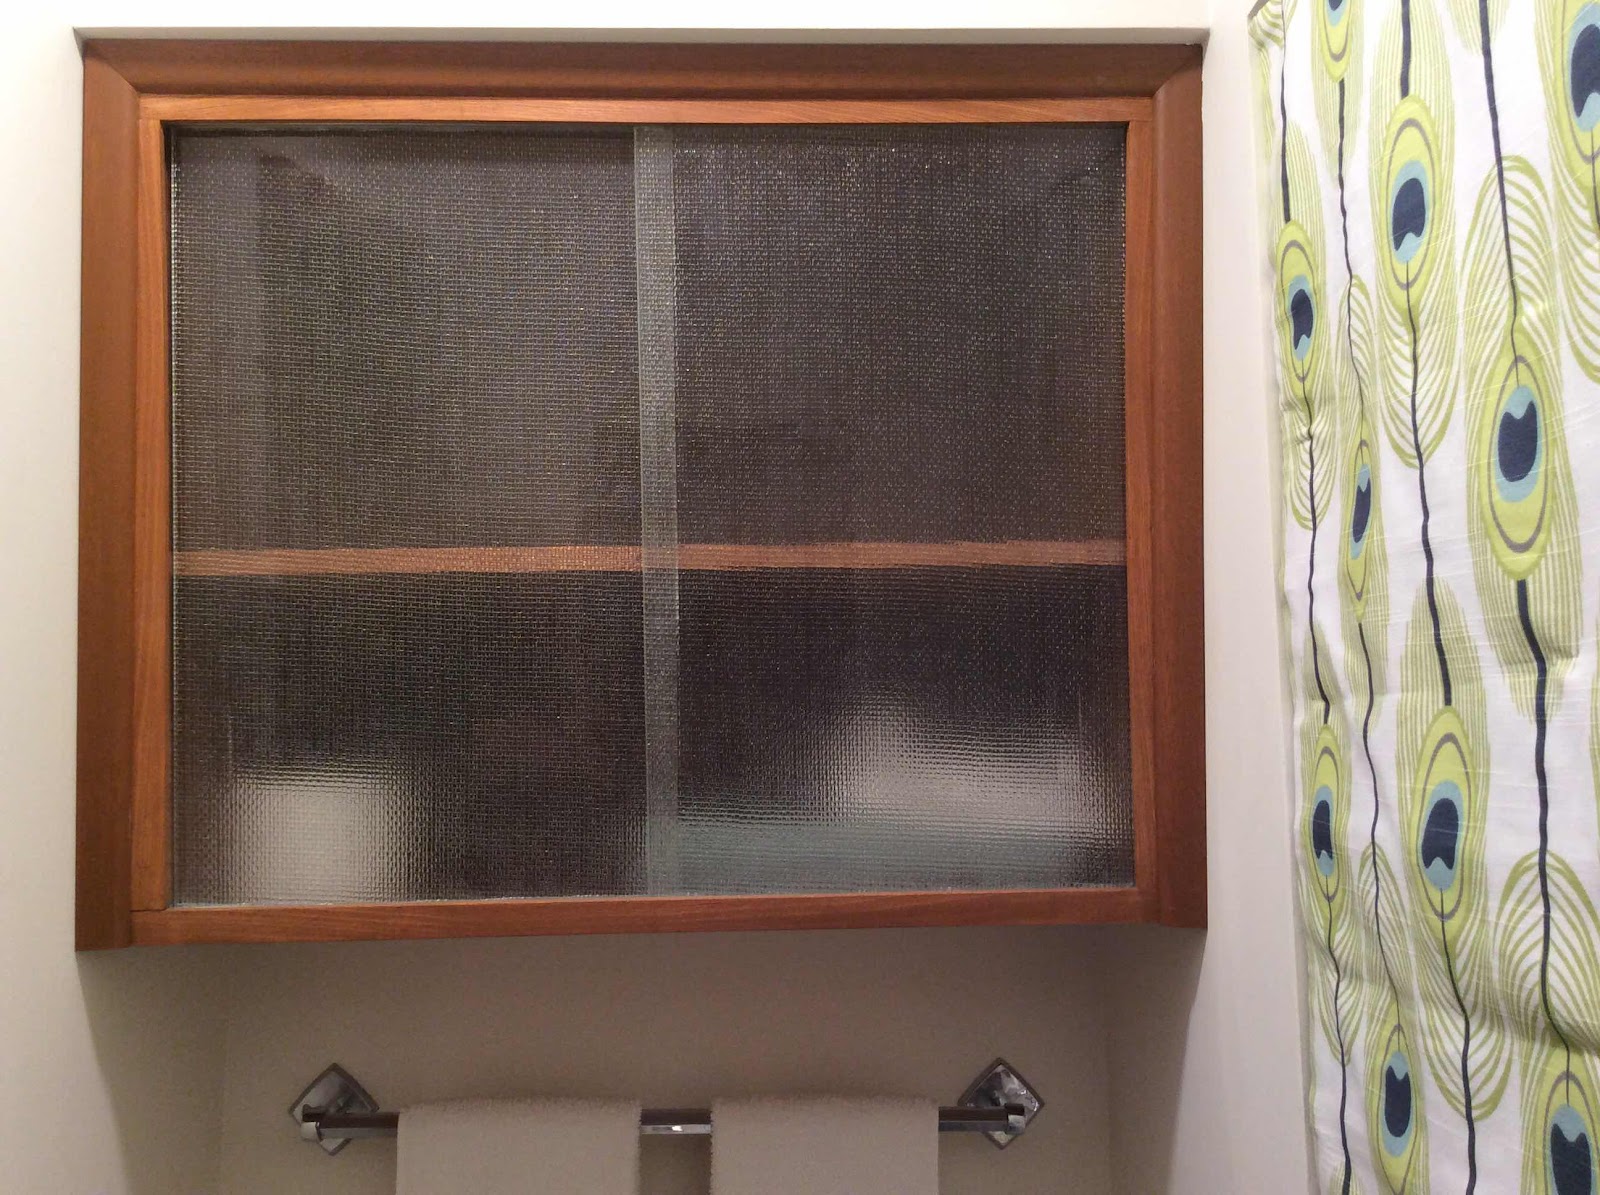
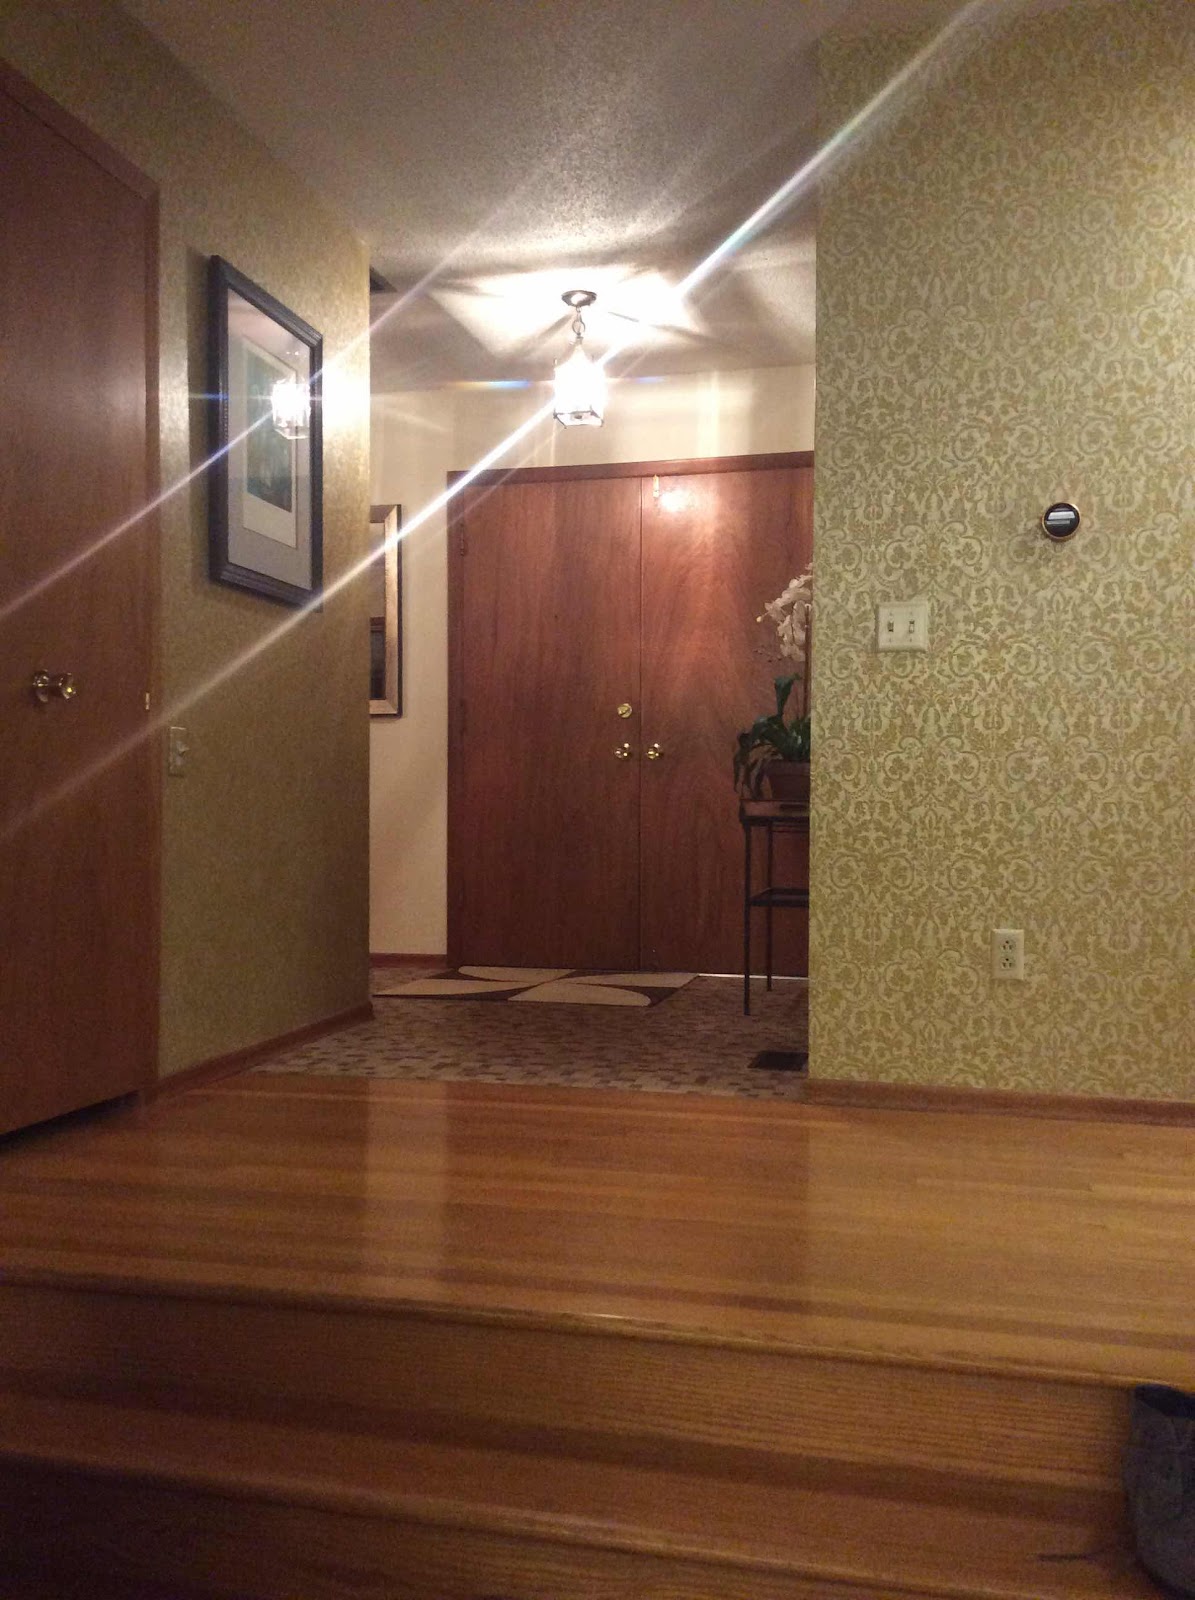
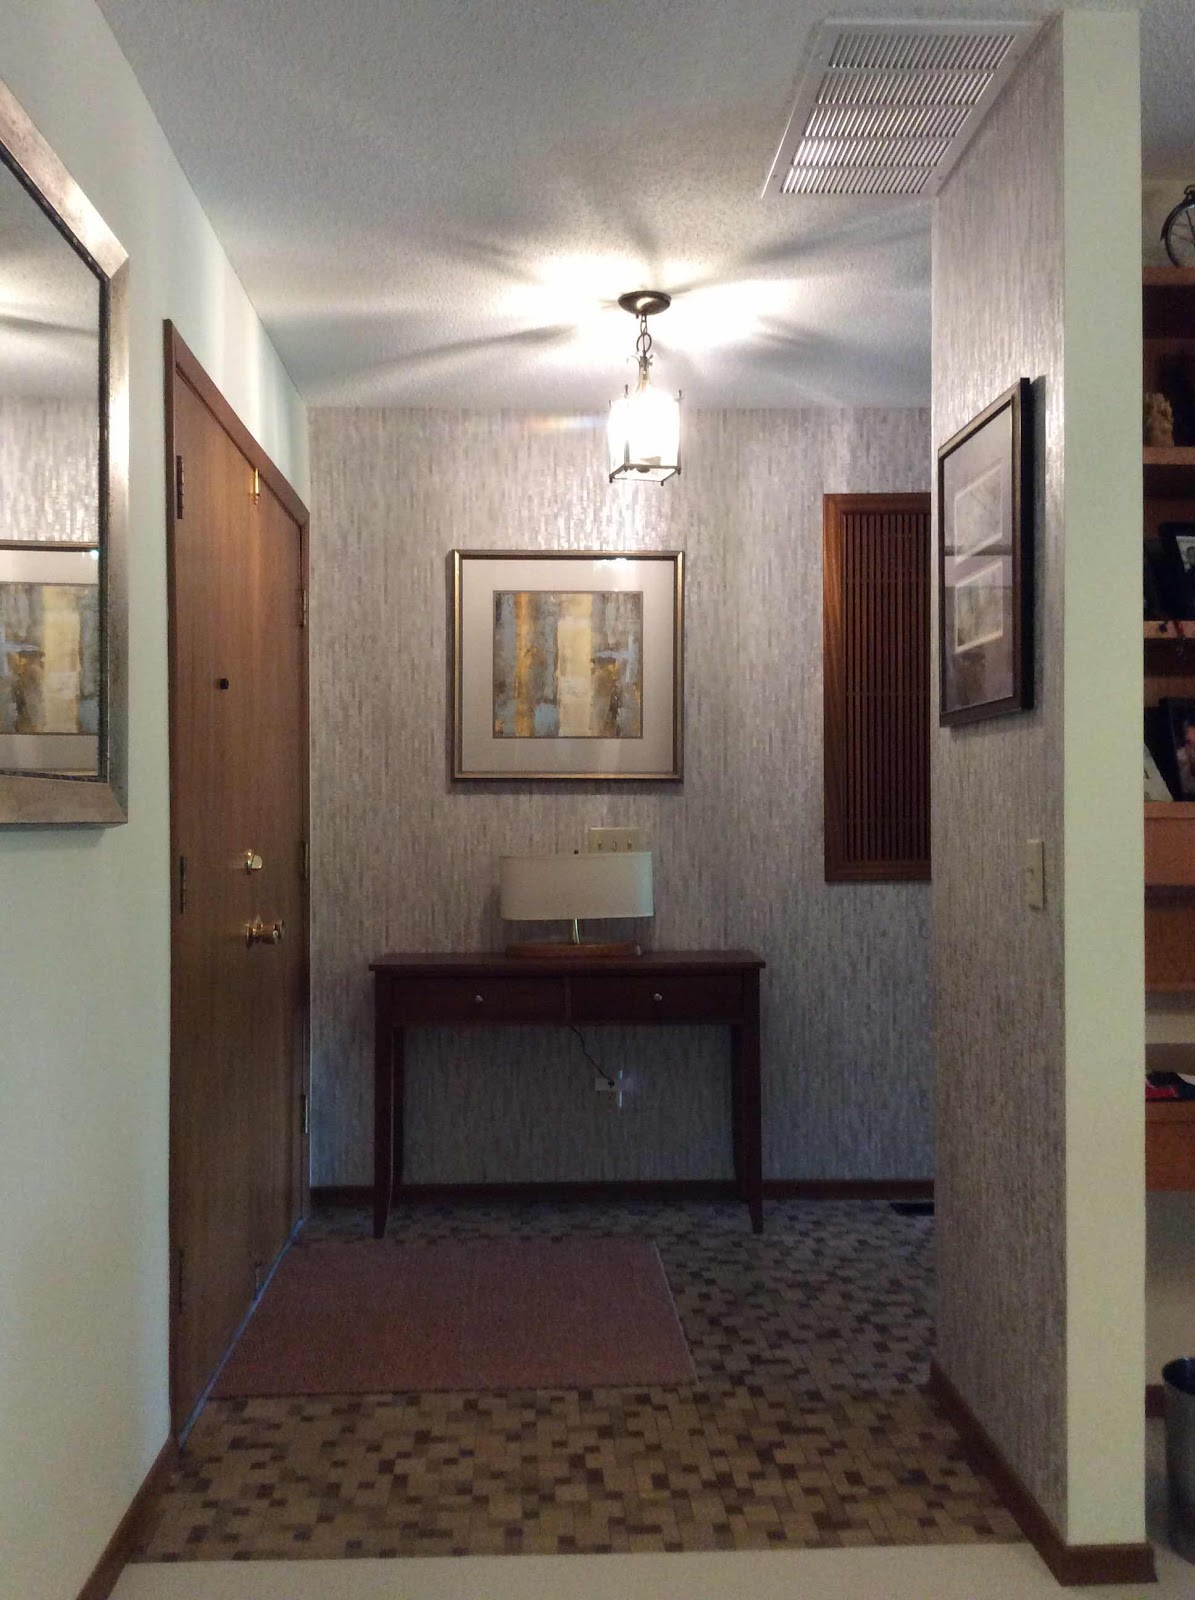
There was one more thing to complete the living area and bedroom wing of the house, and that was replacing the wallpaper in the halls. While the current wallpaper was in surprisingly good shape considering its age, it was very tired and actually a bit musty. Beth has been looking at wallpaper patterns almost since we moved into the Ranch. Did we want something that made a statement? A fun retro print? Something that accented the other colors and design elements? There were many online viewings and numerous samples ordered for review. Visitors to the house were asked their opinions and even more samples ordered.


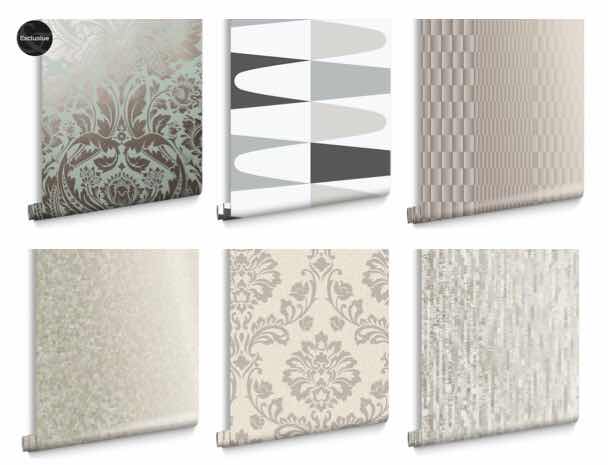
I have wallpapered before and was planning to tackle this project. However, after seeing the price of the materials and knowing how my eye can pick a job apart, if done poorly, we decided to find a pro. We received a referral, and after Michael (the wallpaper guy) sized up the job (and Beth had decided, finally, which wallpaper would best accent the entry and hallway, while giving a nod to the heritage of the Ranch) we placed our wallpaper order and scheduled the project. Several areas needed to be patched so Ted tDwG was able to do those repairs/patches as a part of his work in the kitchen dining room project - the last reminder of a long disabled alarm system now just a memory. NWHC pulled down all of the trim from the closet door, floor molding and doorbell box.

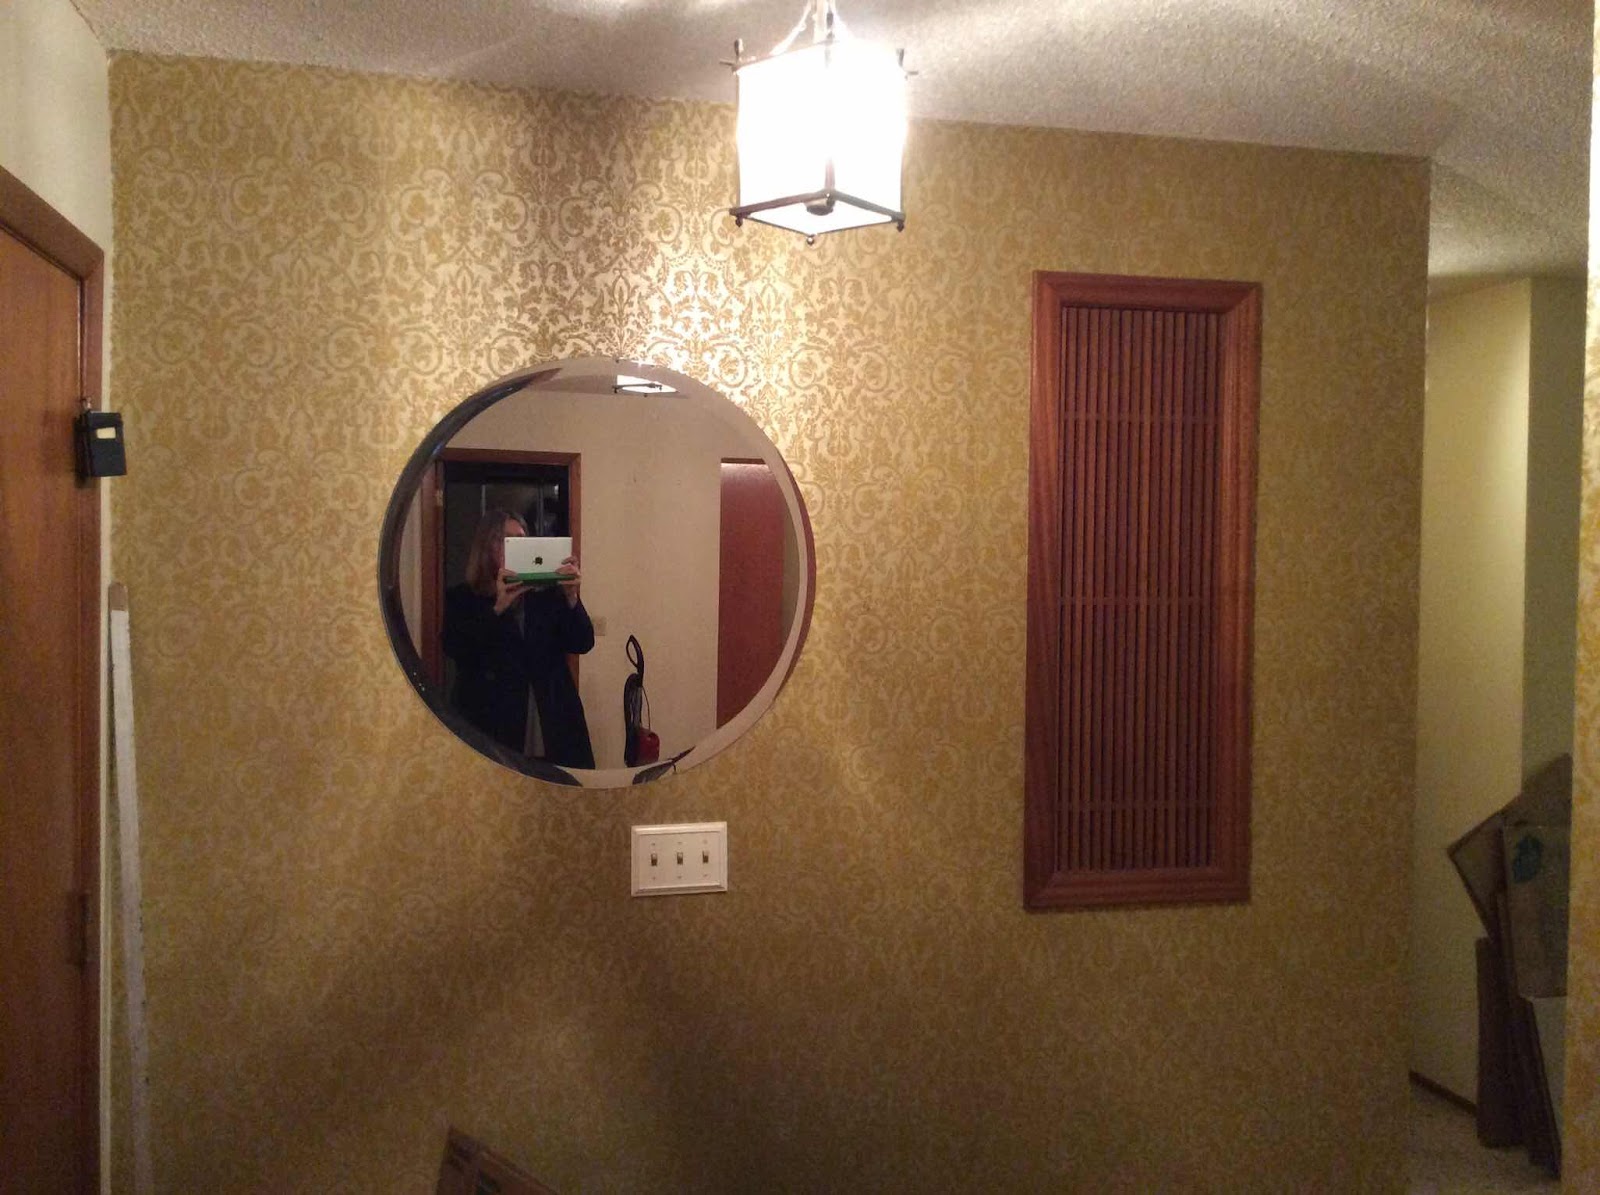
Michael stripped the old paper off and prepped the walls and completed hanging the new paper in just two days. Given the fight the old wallpaper put up, we were happy we decided to have Michael take on that work. The NWHC crew reinstalled all of the trim and moldings several days later. They even used a run of our new, custom made moldings in the hall as the original strip had 55 year of wear and tear on it.


What a difference these two projects haves made in the Ranch. Everything just feels finished in the living areas. Daniel said the wallpaper reminds him of birch trees. That makes me smile as I walk through our birch grove from the bedrooms through the dining room and into the kitchen, knowing that we are nearly done with the interior restorations of the Ranch.


What will we do with our spare time? There are still more rocks to deal with and various smaller painting efforts to keep us busy before the Stanley Cup Champion St. Louis Blues take to the ice again this fall to defend their title.

Wednesday, July 24, 2019

Camping in the Kitchen or the Kitchen/Dining Room Project, Part One

While nothing will ever come close to the disruption of creature comforts of the bathroom renovation, showering on the patio for two months and a porta-potty on the driveway, the kitchen renovation project over the past couple months certainly added a colorful chapter to the ongoing saga of the Retro Ranch restoration. Beth may try to tell you that she was successful in cooking a frozen pizza on the Weber grill but I respectfully and completely disagree. (And Beth says “Mm, hmm.”) More on that later.

This was the year we were going to refresh the entire kitchen and the dining room floor. This should have been the last of the major restorations and disruptions at the Ranch. We received the estimates early in the year from our trusted contractors – Northwest Home Concierge (NWHC) for refinishing the kitchen cabinets, new countertops and backsplash, new marmoleum floors in the kitchen and dining room along with the necessary drywall, electrical and trim to complete these two rooms. In addition, new kitchen appliances were on top of these estimates. Unfortunately, due to the changes in the US tax laws (or the billionaire’s tax relief program as I call it) instead of our available funds going to our favorite contractors, their subs and local material suppliers, we sent a significant check to Washington, D.C. - insert cartoon swearing here.

Being short of the necessary liquid cash for the entire restoration, we went back to NWHC and asked Troy and Gordon to split the project over two years. Flooring and baseboard trim this year; countertops, backsplash and cabinet refinishing next year. The fun began in May. A week or two before the project started I removed the wallpaper (and paste) from the sofit over the cabinets and painted those areas. The range, dishwasher and fridge were the first things to go with only the fridge remaining functional in the garage. With appliances out there was more painting to do. 

This is where the camping begins. While the dishwasher was outdated and inefficient, it was also a convenient place to store dirty dishes until you had a full load. With the range/oven now stored in the garage, our only means of cooking at home were the microwave, and the grill on the patio - the kitchen now having gaping holes where major appliances had been.

Next up the vinyl flooring in the kitchen and the newly (since December) exposed vinyl flooring in the dining room was pulled up, old sub floor removed and a new sub floor installed. The NWHC team seems to love demo days as this work was completed in less than three days. Ted the Drywall Guy came out to do some repairs where the old dining room carpet had previously rolled up on the walls (an odd design that was popular at one time.) Ted tDwG also repaired some holes under the sink where old plumbing lines had previously been and some old water damage behind the dishwasher. Of course, that meant some additional painting.

Now it was time to start making things beautiful. Robert, who did the flooring and tile work in the laundry room/half bath project late last year, came with an amazing design concept for the kitchen floor that utilized some of the leftover blue marmoleum from the laundry room project that looks like a small area rug in the kitchen. Wow, what an artisan. He also used some marmoleum remnants to refresh under the kitchen sink and in the large garage cabinet floor.


With the new flooring in place, the NWHC team installed the moldings in the dining room and extended into the hallway. Some of the moulding was original and other pieces were from the batch we had custom made last winter for the laundry room project. It looks amazing.

Maybe a only microwave and a Weber Grill to cook ia a first world problem. Maybe washing dishes by hand is nothing to complain about and any number of people we know have refrigerators in the garage. Somehow we survived these inconveniences until that magic Friday when Standard TV and Appliance delivered and installed both the new dishwasher and range. While not “vintage” they look great in the kitchen - certainly better than the gaping holes where the old ones had been. A new refrigerator will wait until next year as a counter depth fridge means resizing the cabinet above the fridge. We will do this when the cabinets are refinished in 2020.


Oh, and about that pizza, Beth decided to try to bake a frozen pizza on the grill one night. (Well, why not?) Let’s just say that cooking a frozen pizza using a cookie sheet on top of a Weber Grill makes for a very darkened bottom crust. I, for one, am very happy to have a functioning range/stove, a 21st century dishwasher and the old fridge back in our halfway renovated kitchen!

Stay tuned for the entry/hall wallpaper and door extension projects!

Monday, June 24, 2019

Landscaping, mulch, mailboxes and ice cream – it must be summer

As our faithful readers know, river rock and gravel are a plague on the landscaping of the Retro Ranch. Over the last two years we have dug, sorted and hauled off countless buckets of rock from under the pine trees in the front yard and on the south side of the driveway. Beth did some planting last fall, but with spring in all of its shapes and forms, the front gardens are really taking shape.


Over the course of three weeks, we extended the beds (and reduced the amount of grass to cut) in front of the garage and under the pines. Beth added numerous perennials and while everything looks great now, in a year or three, it will look fantastic. We cleaned up other garden borders and spread over 70 bags of mulch to “finish” the gardens. We even built a small retaining wall near the patio to ease the grade transition.


Beth found annuals for the back garden that hopefully the long-legged rats (the deer) won’t nosh as their midnight snacks. The transformation of the yard from 2017 to now is really a site to behold. Having working hose bibs and spigots to water things is a wonderful convenience too.


The icing on the cake for the landscaping project was the new mailbox. When we first bought the Ranch, our mailbox was engulfed in ivy and was, like many things at the Ranch, not the most functional of boxes. 


After freeing the old mailbox (and our neighbor Martina’s) from the overgrowth of ivy, I painted the post and replaced the mailbox with a “temporary“ box that served us well for two years. 


Beth had found period appropriate “vintage” mailboxes in the perfect color palates to properly accent the Ranch. One of the reasons we painted the front door orange last summer was that we had a matching mailbox picked out. 


After expanding the front garden (and with approval of the United States Postal Service) we installed our new “Modbox” mailbox in the garden (in line with the front door). It’s the cherry on top of the milkshake!

Just wondering, does anyone else have a craving for a Dreamsicle ice cream bar right now?

Coming soon to the Retro Ranch blog – the kitchen/dining room and hall facelifts. 


Sunday, June 16, 2019

The Garage, or The Never-ending Story

We are back! Our friends at Google having taken the Retro Ranch website hostage for a couple of months, we have been busy working but not posting updates. Time flies and amazing it’s been over 2 ½ years in the Ranch. A source of aggravation for Beth the entire time has been the garage. At the center of her angst are several pallets of “stuff” (mostly mine) that haven’t found a home beyond the boxes on the pallets. (Spoiler alert – it still hasn’t – yet.) “Stuff” aside, the garage has undergone a slow (tediously slow) renovation in the past 12 months.


Garages are a place for bikes, cars, furnaces, storage (AKA stuff), and waste and recycling receptacles in most homes. Since starting the restoration of the Retro Ranch, our garage has also been a staging area/workshop for the Northwest Home Concierge Team (NWHC) and their sub-contractors on many occasions. During these times the Mini gets exiled to the driveway or street and his been known to mutter about getting no respect ala Rodney Dangerfield. Despite all of the projects going on, faithful readers know the garage hasn’t been ignored prior to it getting its face lift.


Early on the garage received a new window treatment, revealing the most amazing and creative collection of curtain rods, hangers and brackets this writer has ever seen. In 2017, the new garage door became a defining element of the exterior. Pull down steps for easier access to attic storage preceeded the insulation work in early 2018. With these things done and with the interior and exterior of the house painted it was time to brighten up the garage starting in late spring of 2018.


It was likely that the garage walls had not seen a fresh coat of paint since 1964. I have never had interior walls suck down paint like these garage walls did. College frat boys can’t down beers any faster than these walls downed paint. It ultimately took 3 coats everywhere to get the necessary level of coverage


For a number of reasons the garage painting was broken into multiple segments, not the least of which was the plumbing (laundry room/half bath) project which, as you recall included relocating doors, water heaters and water service lines. All of which meant Ted the Drywall Guy was creating and recreating surfaces that would need paint. Painting the ceiling meant plugging ~30 holes where large storage hooks were previously screwed into the ceiling, suspending lord only knows what. New LED lights further brighten what had been a dingy space. Once the laundry room/half bath drywall work was completed I was able to finish painting the walls and all of the garage trim.


The built-in storage cabinets were next and were painted a darker gray to match the exterior trim. Before the upper cabinets would get painted they needed to be reinforced as years of too much weight in them caused a sag which wouldn’t let the sliding doors move freely. Daniel, our master finish-carpenter, added “knees” which provided the required support. Cabinets were emptied (causing even more heartburn for Beth), the interiors and exteriors painted.


New wire shelving was mounted for bike gear and other storage. While we remain big fans of The Home Depot, I will say that our experiences getting shelving pieces cut to size probably resulted in the manufacturer having to “eat” some shelving due to the ineptitude of various store associates. How difficult can a pair of oversize bolt cutters be to operate anyway?


With the garage and cabinets painted and storage improvements in place, why isn’t the stuff all in it’s home yet? As mentioned earlier in this post, the garage is a staging area for NWHC while projects are ongoing. Shortly we will be writing about the new kitchen/dining room floor project which will explain why, in addition to two pallets of stuff, the garage is also home to the old range, dishwasher (no Beth didn’t exile me to the garage) and, for a time, the refrigerator, dining room furniture, light fixtures and more. 


While there is possibly light at the end of the garage project tunnel, it’s summer. Time for digging more rocks, landscape projects, enjoying the patio, cycling and, at every opportunity, letting everyone with earshot know the St. Louis Blues are the 2019 Stanley Cup Champions. Let’s Go Blues! 


Sunday, April 14, 2019

The Laundry Room Half Bath Project – or how a Plumbing Project Touched Every Room in the Retro Ranch (and almost every exterior wall too!)

 Episode VIII - The Last Details


By now, you probably know more about the trials and tribulations of the plumbing project we initially referred to as the laundry room / half bath project than you likely wanted. As our readers know, we are trying to restore, not renovate, the Retro Ranch. There are so many cool and subtle design features of the ranch that to do anything not in keeping with those features would be a design faux pas or downright shame.


The woodwork in the house is mahogany but when we did the bathroom renovations (yes they were too far gone to restore) in 2017, we didn’t match the trim. That bothered both Beth and I, so with the help of Gordon at NWHC, we had a die made to match the baseboard molding and 100’ of mahogany trim made. This took a bit longer than anticipated but by mid-January, NWHC was ready to complete the project. The NWHC team did a masterful job of matching the stain and were able to bring the original windowsill in the (now) half bath back to its original splendor, undoing years of stains and neglect. In addition to matching the baseboard molding, NWHC was able to match the door trim by milling some stock mahogany trim.  As an added bonus, Gordon replaced all of the baseboard molding in the two bathrooms with the “new original” mahogany trim and it was the perfect exclamation point to an already outstanding job.


The NWHC trim work simply looks like it was always in the house. Amazing! Did we mention that we used the original towel bars from the renovated bathrooms in the half bath? We had saved the mid-century fantastic cabinet from the master bath which was installed in the half bath and trimmed out masterfully by NWHC. It still needs some TLC from Beth and I…soon.


With the trim work complete and a quiet dryer we were able to (finally) assemble the laundry room cabinet from Easy Closets - the 16 boxes of materials occupying the garage for a couple of months. It went in place like it was designed for it, which it was. Beth has become a master at the Easy Closets designs and I am almost okay at installing them.


The only thing left to do on the laundry room half bath project, besides the mid-century fantastic cabinet work, is some sanding and staining of the door and trim of the door that was repositioned and flipped between the laundry room and garage.  I promise I will get to it…soon (this year). The current project is finishing the garage remodel (which is our next Retro Ranch blog, coming soon). However with things greening up and more rocks to unearth, landscaping to refresh and some trim painting to redo, it is time to get back outdoors and enjoy spring in the Pacific Northwest.

Thursday, March 21, 2019

The Laundry Room Half Bath Project – or how a Plumbing Project Touched Every Room in the Retro Ranch (and almost every exterior wall too!)

Episode VII – The Washer and Dryer Awaken (Loudly)

In the last installment I failed to mention some of the other electrical and plumbing work that had been done. In the garage we had a new wash tub roughed in behind the half bath sink. This meant a light fixture over this sink and another ground fault outlet. The plumbing vent stack in that wall interfered with the planned medicine cabinet over the half bath sink, which in hind sight we really didn’t need. In electrical news, to remove the non-functioning hose bib near the corner of the garage meant installing a new grounding rod for the electrical system as the grounding was currently attached to the old hose bib. Several more minor annoyances were checked off the to-do list! 

It was time for the finish plumbing and electrical. The sink, toilet and wash tub in the garage all went in without incident. The new super energy efficient heat pump water heater was put into place and connected. More hot water, faster with a lower electrical bill – hurray. However, when the earthquake straps were installed one of the anchor bolts pierced a water line – oops! So, the water was shut off, the drywall cut and a repair was made to the pierced pipe. So while we were not without water for very long, it meant more work for Ted the Drywall Guy and accompanying drywall dust throughout the garage. 


Before taking delivery on a new stacked washer/dryer we wanted the new supply lines and water heater installed. As you may recall from previous blogs, we didn’t want to introduce rust from the old systems into the new appliances. On a Saturday morning, 10 days before Christmas, the Laundry Fairy (affectionately named by Beth) got his new Whirlpool washer/dryer. No more hauling baskets of laundry to our condo in Astoria (dubbed the laundromat during November and December) or to an actual laundromat. Christmas had indeed come early.  Laundry soon started and when clothes went into the dryer I thought it was a bit loud. Actually, more than a bit loud. You could hear the dryer in any room in the house, even with doors closed. 


With Christmas days away and getting ready to head to Chicago to see the kids and grandkids, a functioning, albeit extremely noisy clothes dryer wasn’t on the top of my list of things to deal with. Enjoying Christmas with the grandkids brought into focus just how loud the dryer was. Our daughter, Ashley, had also done some remodeling this year and had a new stacked Maytag washer/dryer that were whisper quiet. As Maytag’s are now just Whirlpool’s with different trim it was time to get things resolved. Standard Appliance sent their technician out and after diagnosing the problem indicated that basically the entire working system of the dryer - blower, heating element, etc. - needed to be replaced. Can you say lemon? 

 I contacted our sales rep at Standard Appliance and explained that I expected them to exchange the dryer. Well this is where tariffs, trade wars and Agent Orange come into play. Seems that they couldn’t get delivery of any more matching dryers at this time. While they did offer an upgraded dryer, they simply did not have matching sets available. A mis-matched set, visible whenever you walked into the house from the garage would have driven the Laundry Fairy crazy (note from Beth - nobody wants an annoyed Laundry Fairy!) Reluctantly we let them install all of the new components in the dryer. The dryer snafu also delayed the installation of the Easy Closets cabinet in the laundry room next to the washer/dryer. The 16 boxes of materials meant the garage was still very crowded, however once the water heater was installed we could typically get the Mini back into shelter. 


I wish I could tell you the new motor, heating element and more fixed the dryer issues. It did reduce the DBA levels - down to the low 70s. But, for reference, a conversational voice is in the mid-50s. This would just not do. So Beth and I made an appointment with our sales rep to work things out. I will say that Standard Appliance made everything right and exchanged our Whirlpool washer/dryer for a more expensive Electrolux set (go Swedes) without a penny out of our pockets. They took an aggravating experience and turned me into a customer for life. Now once I figure out how to turn down the beeper on these units that chirps whenever the load is complete, everything will be great! 


Ted the Drywall Guy did his magic in the garage (behind the water heater) and the project is almost complete. Not so fast there Bucky! There is the saga of the trim and shelving systems in the garage still to come.